Working With IntelliJ IDEA
This lab will have you install IntelliJ IDEA and open up the project generated from lab 4 so you can start working with it in a proper development environment.
Step 1: Install IDEA
If you haven't already installed IntelliJ IDEA, see these instructions.
Step 2: Open Project
Let's load the project into IDEA.
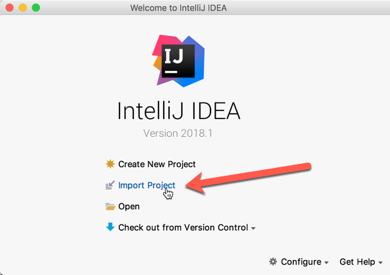
- Start IntelliJ IDEA and you'll see a welcome screen that looks like this
-
Click on Import Project
-
Navigate to where you generated the project from Lab 4, and select the
pom.xmlfile. -
On the next screen, click OK to finish the project import.
Step 3: Run AppTest
Let's run the test from within IDEA.
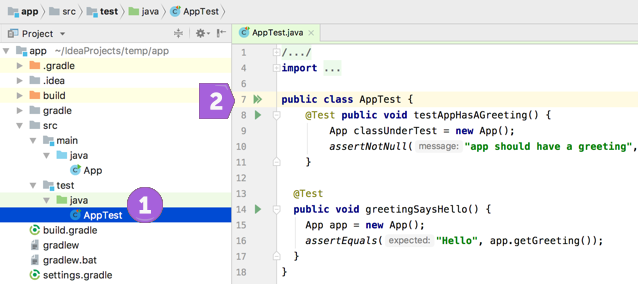
- Navigate to the
AppTestclass (1), then click on the double green arrow (2) and selectRun 'AppTest'
- You should see IDEA build your project, run the tests, and show the results of the tests in the bottom panel.
Step 4: Fix Broken Test
If you didn't fix the bonus test from Lab 4, now's your chance.
- Add the following test to the
AppTestclass (if you haven't already):
@Test
public void greetingSaysHello() {
  App app = new App();
  assertEquals("Hello", app.getGreeting());
}
-
Re-run all the tests (like you did in Step 3 above).
Rerun: Button and Shortcut
You can also re-run the tests by clicking on the
Rerunbutton (see image below), or by using the keyboard shortcutCtrl+Shift+R(Mac) orShift+F10(Windows).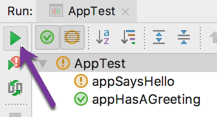
-
If a test fails, look closely at the output and see if you can figure out what went wrong and how to fix it.
-
If you think you fixed it, re-run the tests until they're all green!
Once you've completed the above steps, check in with the instructor to review your code.